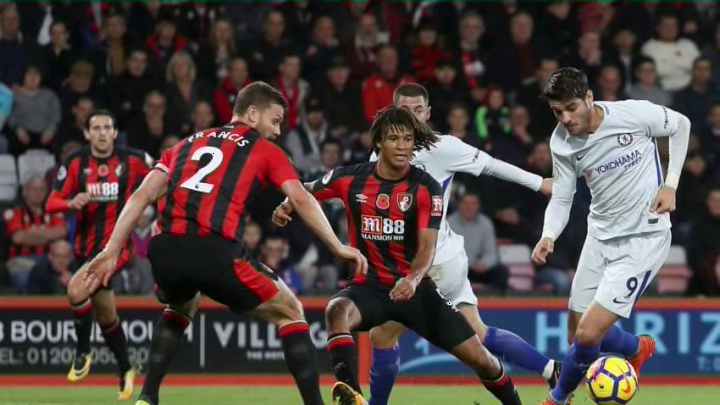
Bournemouth blanketed Alvaro Morata with defenders, denying him the chance to have an impact in Chelsea’s final third. Chelsea and Morata need to overcome this simple yet effective tactic.
Perhaps if Alvaro Morata had joined Tiemoue Bakayoko and dyed his hair blue, he would have been easier to see on Saturday. Two or three red-and-black striped jerseys were within arm’s reach of Morata for 90 minutes on Saturday, keeping Chelsea’s centre-forward a bit player in the 1-0 win.
Bournemouth added defenders to Morata’s retinue the closer he came to a dangerous position. When the Cherries had the ball in Chelsea’s defensive area, a lone Bournemouth centre-back escorted Morata as he prowled the edge of midfield. Once Morata crossed midfield he would attract an additional marker, and they would close the distance to him to a matter of yards. By the time Morata entered the final third, he was barely visible to teammates and fans alike.
Overloading the centre-forward 3v1 opens plenty of space elsewhere on the pitch, but Chelsea had mixed results exploiting it. The Blues scored their only goal when Morata was able to control the ball in the middle of four Bournemouth defenders.
They each stood several yards off him, giving him enough room to control the ball, turn upfield and loop a pass to Eden Hazard. Because four players surrounded Morata and two more were watching him, Hazard moved into a wide open area unnoticed and unmarked. He only a needed routine (for him) touch and burst of speed to be eye-to-eye with Asmir Begovic and blast a shot in at the near post.
Must Read: Antonio Conte channels Sir Alex Ferguson at Chelsea's press conference
Hazard took advantage of the space Bournemouth conceded when he had the ball, and Pedro found that space with his off-the-ball runs. But as Morata moved towards the box, so did his defensive entourage. This meant up to eight Cherries clogged the middle of the box – surrounding the target man – whenever Chelsea had the ball. Bournemouth let Hazard and Chelsea’s wing-backs have the wide spaces because they knew the box was secure. Again, it is important to note that Chelsea’s goal came on a break, not as a result of a build-up.
Cesc Fabregas aimed many passes to Alvaro Morata, but most went straight to the head of whoever was marking Chelsea’s No. 9. Fabregas floated too many of his passes, giving Bournemouth plenty of time to get in front of them. Even if Morata momentarily broke free and Fabregas saw his run, the defender reached Morata before the ball.
Few teams will play such a blunt defence against Alvaro Morata. However, 19th place Bournemouth showed how effective it is. A team with stronger defenders may be able to neutralize Morata with only two markers instead of the team effort Bournemouth used. This would take Morata out of the game without creating pockets of space for Hazard and the rest of Chelsea.
As Morata regains his confidence and movement post-injury he will be better able to break free of his markers and move into the space they vacate. However, the rest of the team need to exploit this tactic. The Blues can not be so dependent on Morata to create scoring chances.
Chelsea’s midfielders and wingers need to make the opposition pay for marking Morata out of the game. They must force the opponent to back off Morata to cover the rest of the pitch and the rest of the Blues’ attack. When Chelsea can do that they will not only help Alvaro Morata. They will reclaim tactical control of the game. They will be able to play their passes, their style and impose their will from all sides of the pitch.
Next: Proper Chels: Ciro Immobile laughs at transfer rumours
Until Chelsea figure this out, Alvaro Morata will be the go / no-go point of Chelsea’s offence. That is a not a good place for Morata, nor for the team.
